Category Archives: SP2013

First steps – How to get an office 365 account to start learning SharePoint in the cloud

I’ve been playing around with Office 365 a little bit. I signed up for the preview a while back and have been using that free of charge since then…

If you’re a SharePoint person then I’m sure you’re aware that SharePoint in the cloud Aka Office 365 is where things are heading. At first this can be a little scary, especially if your company doesn’t currently subscribe to Office 365. Office 365 subscriptions come in a variety of flavors, and a variety of per month costs! – how do you get involved, how do you learn it, without breaking the bank?

It turns out there are a few ways to get involved, that you can have 100% control of, without needing a corporate account, and you can do it right n o w.

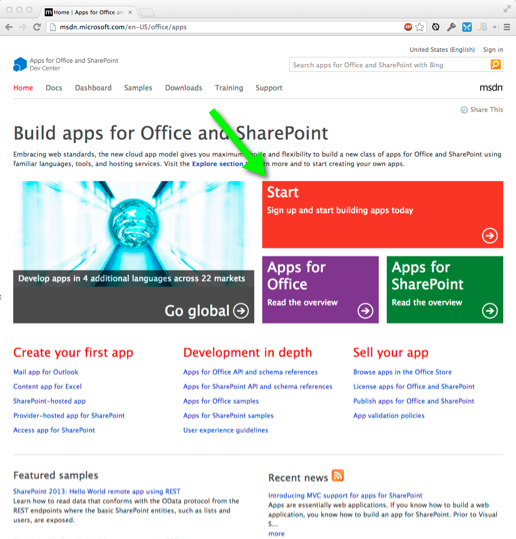
Step1: Visit Dev.office.com

On this page as of this writing Click the Big Start Button:
dev.office.com

Step2: On this page we have a few options:
dev.office.com_step2

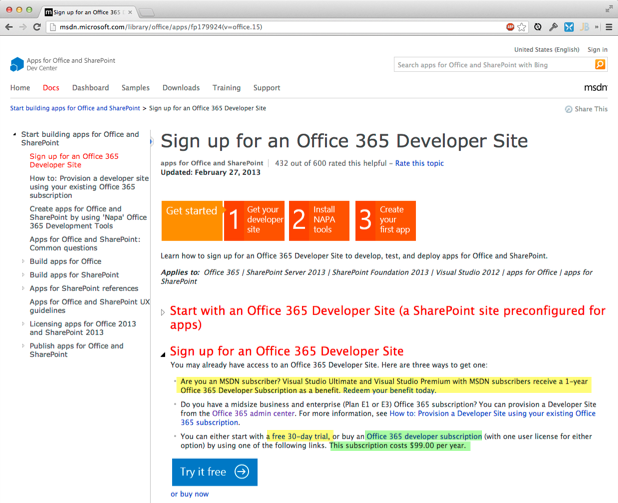
Expand “Sign up for an Office 365 Developer Site”
Now:

This last option is the most interesting one… I’ve had my free trial for at least 6 months now. In talking with various Microsoft people at the SharePoint Conference last year, several of them mentioned that it’s possible to renew the free trial, and that if your company has a Microsoft TAM (Technical Account Manager) then that person can assist on getting this extended. I got the impression they could extend it pretty much forever, and that’s certainly been the case with my trial, It’s still live 6 months later and I’ve not even called my TAM yet!

Summary:
There are a few ways to sign up for a test account on Office 365, most of them are free, but worst case scenario, you’re only out $99/yr ($8.25 a month)

Tip:
All the office 365 accounts are tied to “Microsoft Accounts” – these have had different names throughout the years (Windows Live, LiveID, Zune, xbox, etc) So… you probably already have one of these and if so you may run into a few problems, as I did, so I want to share a few tips…

When you log in to any Microsoft service using a Microsoft Account, you have the option to “remain logged in” If you do this, a Cookie is saved in your browser – this can cause confusion if you have multiple accounts, which you’re likely to have once you sign up for the services above. So here are a few tips-

  • It’s always helpful to save the URL to sign in with – this is typically sent in a welcome email for the service in question. I’ve found that if I go to my o365 site and am unable to sign in using the sights “Sign in” page, I can always use that original URL to sign in, and that works every time.
  • Almost all problems with sign on are cookie related – meaning you can fix them easily by deleting all your cookies
  • If you have lots of work to do and need to be logged in to two accounts at once, you can try one of these approaches:
    • Use different browsers ie one ID is logged into IE and another into Chrome.
    • Sign in but don’t check the “remember me” option.

Ok so now that the mechanics are out of the way, You probably can’t wait to get started. There is a cool Development environment in the browser called Napa, which you’ll want to install. Step 2 in the above screenshot outlines it, but you might run into trouble (I did) and if so this article by Krunal Patel might be helpful: Enable Napa App for Office Online Development with SharePoint

With that installed and out of the way, here’s an article to get you started developing your first app for SP2013 in Office 365:

How to: Create a basic app for SharePoint by using “Napa” Office 365 Development Tools

Powershell for working with SharePoint Recycle Bin

I had to look through the SharePoint recycle bin today to look for something – the UI interface is a bit lacking – it only shows 200 items at a time with no ability to search so I turned to powershell…

Looking at the recycle bin is actually very easy…

# recycle bin's are tied to a site collection so we need a site collection object

$site = get-spsite http://www.yoururl.com

#we can see everything in the recycle bin like this:
$site.Recyclebin

#unfortunately, the above command dumps quite a lot to the screen.
#fortunately, we can pipe the output to other commands for filtering and cleanup.

#This command will return all the webs in the recyclebin
$site.Recyclebin | where {$_.itemtype -eq "web"}

#we can build on this by adding a sort statement, 
#here I sort by dirname, which is the URL path the item would have been at before it was deleted
$site.Recyclebin | where {$_.itemtype -eq "web"} | sort dirname

# we can format the output into a nice list
$site.Recyclebin | where {$_.itemtype -eq "web"} | sort dirname | select title, itemtype, dirname, itemstate

#note that in the above listing, itemstate shows which recycle bin it's in (FirstStageRecyclebin = End user Recycle Bin Items, SecondStageRecycleBin = Deleted from end user Recycle Bin)

#here's one more application of filtering to show everything that's not a page nor a list item

$site.RecycleBin | where { $_.itemtype -ne "file" -and $_.itemtype -ne "ListItem" } | sort dirname | select title, itemtype, dirname

Using some of the simple queries above, I was able to look deep inside our recycle bin quickly without having to browse it in pages of 200 items at a time.

Update: this came in kinda handy.. one of our developers wrote some “site clean up code” Long story short, several hundred web’s were deleted that should not have been…

#script to restore all the webs in the recycle bin
#note: be sure to scroll over
#the word press template cuts off the right side
# or choose "Full screen" from the menu on this code window
$SiteCollection = get-spsite http://www.yoururl.com
$SitesToRecover = $siteCollection.RecycleBin | Where {$_.ItemType -eq "Web" -and 
#in this where clause, it's best to run this twice - the first time, restrict it to the root sites, with the $_.Dirname -eq "sites/myteamsites", then after those have been restored, you can take that last statement out and run it again to get the sub sub webs.
$_.DeletedBy -like "SHAREPOINT\system" -and $_.Web -Like "" -and $_.DirName -eq "yourrootURLfragment"}
foreach ($OneSite in $SitesToRecover) { $OneSite.Restore() }


One More:

#Deleting an item didn't work with the $item.delete() 
#"Due to the state of the object" 

#I found this worked instead
$sitecol = $get-spsite http://yoururl.com
$items = $sitecol.recyclebin
$item = $items | Select -first 1
$Guid = new-object system.guid($item.id)
$sitecol.recyclebin.delete($guid)


Using MaintenanceWindows in SharePoint 2013

Sharepoint 2013 Maintenance Window Banner ScreenShot
Sharepoint 2013 Maintenance Window Banner


At the SharePoint Conference this week, Session SP210 on upgrading to SP2013 mentioned a brand new feature that didn’t exit in the preview edition: MaintenanceWindows.

As you can see from the screenshot above, this feature puts up a simple banner alerting users of the upcoming work.

The message is localized in the users language so long as language packs are installed.

The “More Information” link can point to any page you specify.

I was pretty excited about this, and couldn’t wait to try it out!

The PowerShell to do this wasn’t as easy as I expected.

I’ve pasted below what worked for me.
 

 #1st get a content database
 get-SPContentDatabase  #this will list them all
                        #copy and paste a database ID and use it to assign a specific DB to a variable
 $ContentDB = Get-SPContentDatbase -Identity #ID goes here

 #now we're going to add a maintenance window to the SPContentDatabase with $ContentDB.MaintenanceWindows.Add()
 #before we can do that we need to create a Maintenance window object and populate it.

 #                         Parameter List             "MaintanceWarning or MaintanencePlanned",  Mt Start   ,  Mt End   , Notify Start, Notify End, duration , urlforinfo
 $MaintWindow = New-Object Microsoft.SharePoint.Administration.SPMaintenanceWindow "MaintenancePlanned", "1/1/2013", "1/2/2013", "11/16/2012" , "1/3/2013", "1:00:00", "http://www.mydomain.com/outageinfo.html"
    #Parameter List for above:
      #1: MaintanceWarning or MaintanencePlanned,
      #2: Maintenance Start Date
      #3: Maintenance End Date
      #4: Notification Start Date
      #5: Notification End Date
      #6: Duration in the format of DD:HH:mm:ss - "1:00:00" = 1 hour, "1:00:00:00" = 1 day
      #7: URL for info
      # Parameters 2-5 all take a date time in this format: "1/20/2012" or "1/20/2012 5:00:00 PM"  

  #Now we can see the properties of a single MaintenanceWindow by just typing in $MW and hitting enter:
  $MaintWindow

  #for me this looked like this:
  # MaintenanceStartDate        : 1/1/2013 6:00:00 AM
  # MaintenanceEndDate          : 1/2/2013 6:00:00 AM
  # Duration                    : 01:00:00
  # NotificationStartDate       : 11/16/2012 6:00:00 AM
  # NotificationEndDate         : 1/3/2013 6:00:00 AM
  # MaintenanceType             : MaintenancePlanned
  # MaintenanceLink             : http://www.mydomain.com/outageinfo.html
  # UpgradedPersistedProperties :

  #ok with that out of the way, we just need to add it to he content database
  $ContentDB.MaintenanceWindows.add($MaintWindow)
  $ContentDB.Update()

Ok so that’s it – refresh your website and you should see the pink banner on the screenshot above!

Note, I originally tried to do this by just setting up a blank object without paramters, and then setting the properties one by one, but I found that MaintenanceStartDate and NotificationStartDate could not be changed after the object was created.

– Jack