Category Archives: PowerShell

Powershell to find all the Access Database Sites on your Web Application in SharePoint

I needed to track down all the access DB’s and wasn’t sure how to do it.

One of our developers came up with a script which I modified a bit.

Original credit goes to Ravi Konaparthi for the script.

This script will look for Access Services DB’s in a SharePoint 2010 Farm.
(This version only looks at a given Web application, but you can easily modify it to search everything – have a look at the comments)

$snapin = Get-PSSnapin | Where-Object {$_.Name -eq 'Microsoft.SharePoint.Powershell'}
if ($snapin -eq $null) 
{
	Write-Host "Loading SharePoint Powershell Snapin"
    Add-PSSnapin "Microsoft.SharePoint.Powershell"
}

#Foreach loop to loop through all webs, and compare the web template and write findings to .csv file.

function Get-AccessDB()
{
    log "In Get-AccessDB"
    $url = getURL
    #NOTE - if you want to look at ALL Sites and not just a specific web application, just remove -webapplication $url from the line below.
    $sites=Get-SPSite -webapplication $url  -limit all
    foreach($Site in $sites)
	{
		log "Inspecting Site $($site.url)"
		foreach($web in $site.AllWebs)
		{
			log "inspecting web $($web.url)"
			if ($web.WebTemplate -like "*ACCSRV*")
			{
				log "Found Access DB in $($web.url)" "Green"
				$hash = @{"[URL]"=$web.Url;}
				New-Object PSObject -Property $hash | Sort-Object
			}
		}
	$site.Dispose()
	}
}

function log($txt, $color)
{
  if ($color -eq $null) { $color = "White" }
  write-host $txt -foregroundcolor $color
}

function getURL()
{
    switch(hostname)
	{
		"SPDEVPC" {$machineURL = "http://yourDevURL.yoursite.com"}
		"SPStagePC" {$machineURL = "https://yourStgURL.yoursite.com"}
		"SPProdSrv" {$machineURL = "https://yourProdURL.yoursite.com"}
		default {write-host "This should be run from either SPDEVPC, SPSTAGEPC or SPPRodSRV - Press any key to exit this script"; read-host; exit}
	}
	return $machineURL
}

Get-AccessDB | Export-csv D:\accessdb.csv
 

Send an email from PowerShell

I’ve used similar code in a few scripts, I have here – I’m putting this post here as a fast reference for those times when I want to copy/paste some email code…

$EmailFrom = "youremail@yourdomain.com"
$EmailTo = "systemreplyemail@yourdomain.com"
$EmailSubject = "Email Subject"
$EmailBody = "Email Body"
$SMTPServer = "yoursmtpserver.yourdomain.com"
$logfile = $filenameToAttach

Send-MailMessage -From $EmailFrom -To $EmailTo -Subject $EmailSubject -body $EmailBody -attachments $Logfile -SmtpServer $SMTPServer

Note this is just a basic example, as always get-help send-mailmessage is the best way to get some additional info on attachments, multiple recipients, credentials etc…


PowerShell to send an email when something happens in the Event Log.

Most larger companies have SCOM or some other monitoring tool in place to watch over SharePoint servers and let the right people know when things go wrong.

That said, there are times when you just need a quick and dirty way to get notified when something shows up in the event log – It might be something temporary, or something you are asked to watch – but to keep under the radar – Or maybe the SCOM team has a backlog and you need to know you’ll be alerted before you go home for the day.

Here is an extremely simple script that can be used in conjunction with Event Viewer to send an email.

Here’s how it works:

1) In Event viewer, find the event log you want to watch. Find the event you are looking for and right click it and choose “Attach a Task To this Event…”

2) Follow the wizard and when you get to the part about what to do, you can choose the default email option, or if you want to add some additional logic, choose to “Run a program”

3) Copy the contents of the script below to a file with a .ps1 extension and alter the script to fit your specific use case.

4) Specify c:\windows\system32\WindowsPowerShell\v1.0\powershell.exe as the name of the executable (do this even if you are using a later version of powershell)

5) Specify the path and name of the script file you created above as the parameter.

$event = get-eventlog -LogName Application -source "Put your source here" -newest 1
#get-help get-eventlog will show there are a handful of other options available for selecting the log entry you want.
if ($event.EntryType -eq "Error")
{
    $PCName = $env:COMPUTERNAME
    $EmailBody = $event.Message
    $EmailFrom = "Your Return Email Address <$PCName@yourdomain.com>"
    $EmailTo = "youremail@yourdomain.com" 
    $EmailSubject = "Your Event Log event was found!"
    $SMTPServer = "mailserver.yourdomain.com"
    Write-host "Sending Email"
    Send-MailMessage -From $EmailFrom -To $EmailTo -Subject $EmailSubject -body $EmailBody -SmtpServer $SMTPServer
}
else
{
    write-host "No error found"
    write-host "Here is the log entry that was inspected:"
    $event
}

Now, anytime the event you specified is found in the log, your script will be triggered.

The first line of the script fetches the most recent log item that matches some core criteria, it’s important to refine this as much as possible, so that you’re not emailing yourself details of event you want and not an event that showed up a split second later.

Final Thoughts:

This is a simple solution, for simple scenarios. I can attest that it’s worked great for me, for my limited scope scenario.  My company also uses SCOM to alert us on the more normal SharePoint issues – I’m not advocating this as a replacement for proper monitoring, but used in the right scenarios, it can be an extra tool available to you.

– Jack

Automating SharePoint Deployments in Windows Azure using PowerShell

There’s a nice article on MSDN titled “Automating SharePoint Deployments in Windows Azure using PowerShell

The article talks about building up a sharepoint environment in Azure. The main difference between this and setting up an office 365 instance that I wrote about in my last post, is that in Azure, you’re in complete control over all the VM’s that make up your environment. If you have MSDN you get a monthly spending allowance on Azure, so you should be able to play around with this stuff without incurring any costs (So long as you don’t leave everything running 24×7) – Seems perfect for test environments. At the bottom of the article are links to a few articles that discuss using PowerShell with Azure.


Powershell to check SSL certificates Expiration dates

SSL certificates expire every now and again.

After getting caught off guard about an expired SSL certificate, I thought I’d search and see if I could find a powershell script I could run on the web front ends where the certs are installed.

I found a post on stack overflow that was a good starting point:
http://stackoverflow.com/questions/16181725/powershell-script-to-find-currently-bound-expiring-certificates-in-iis

I made a few simple modifications, formatting the output slightly differently, and adding email to the script, but basically what you see below is mostly from the above post, credit goes to Ansgar Wiechers for posting the solution I used.

You’ll want to test the script as is, then change the $DaysToExpiration to something more reasonable such as 30.

import-module webadministration
$DaysToExpiration = 700 #change this once it's working

$expirationDate = (Get-Date).AddDays($DaysToExpiration)

$sites = Get-Website | ? { $_.State -eq "Started" } | % { $_.Name }
$certs = Get-ChildItem IIS:SSLBindings | ? {
           $sites -contains $_.Sites.Value
         } | % { $_.Thumbprint }

$body = Get-ChildItem CERT:LocalMachine/My | ? {
  $certs -contains $_.Thumbprint -and $_.NotAfter -lt $expirationDate
}
$body | select friendlyname, Subject, @{Name="Expiration"; Expression = {$_.NotAfter}} | fl | out-string

$PCName = $env:COMPUTERNAME
$EmailFrom = "$PCName@yourdomain.com"
$EmailTo = "YourEmail@yourdomain.com"
$EmailBody = $body | select friendlyname, Subject, @{Name="Expiration"; Expression = {$_.NotAfter}} | fl | out-string
$EmailSubject = "Certificates Expiring within $DaysToExpiration days"
$SMTPServer = "yoursmtpserver.yourdomain.com"

if ($EmailBody.Length -gt 1)
{
  Write-host "Sending Email"
  Send-MailMessage -From $EmailFrom -To $EmailTo -Subject $EmailSubject -body $EmailBody -SmtpServer $SMTPServer
}

I added this script to the “Scripts” folder on my Web servers, and then created a windows “Scheduled task” to run PowerShell along with the script, scheduled nightly. I let it run a few times with $DaysToExpiration set to 700 (to confirm I would actually get the email.) After I knew that it worked I changed the number to a more reasonable 45.

Powershell to add a user to a group on remote machines

Problem:
A new Developer is brought on board and needs access to the ULS logs on 10 different machines.

2 part solution:
Part 1:
This only has to be done once, so I did this manually, A powershell script would be great for this, but I don’t have one – Sorry!

  • Create a local group on each server called “LogReaders”
  • Share the ULS logs folder on each server
  • Add “read” permissions to the “LogReaders” group to the share/NTFS permissions for the ULS log folder

Part 2:
Use the following script, updating values to match your environment –
Run the script as needed, each time a new developer needs access to the log folders

#AddUserToLogs.ps1
#this script is an adaptation of a forum post by jrv: http://social.technet.microsoft.com/Forums/en-US/ITCG/thread/35b8022e-7c0e-49fb-b4c7-346b83ed3fd0/
#jrv (http://social.technet.microsoft.com/profile/jrv/?ws=usercard-mini) provided the function Add-LocalUser
# I added the wrapper to make it work for my needs
function main {

	$user = "userIDneededtobeadded"
	$domain = "yourdomain"
	$Group = "LogReaders"
	$computers = @("computernanme1", "computername2", "computername3", "etc..") 

	foreach ($Computer in $Computers) {
		write-host $computer -foregroundcolor green
		Add-LocalUser -Computer $Computer -group $group -userdomain $domain -username $user
	}
}

function Add-LocalUser{
     Param(
        $computer=$env:computername,
        $group="LogReaders",
        $userdomain=$env:userdomain,
        $username=$env:username
    )
        ([ADSI]"WinNT://$computer/$Group,group").psbase.Invoke("Add",([ADSI]"WinNT://$domain/$user").path)
}

main

PowerShell Cheat Sheet V2.00

CheatSheetP1

For years I’ve had this handy PowerShell Cheat Sheet at my desk, the original came from:  http://blogs.msdn.com/b/powershell/archive/2007/01/25/powershell-cheat-sheet-redux-the-pdf-version.aspx

I’ve looked a few times for an update, but never found one so I created my own.

I emailed the original author, Ben Pearce from Microsoft to ask his permission to post my updated version online. Ben replied it was ok:

Hi Jack

Thanks for sending me this.  It’s really nice to hear that you found the cheat sheet useful.  I’ve stopped working so closely with PowerShell now and actually manage a team of Premier Field Engineers.  So, I haven’t updated the sheet and I`m not aware of new version circulating.

Thanks for taking the time to update it yourself and feel free to post this on your blog.
Thanks

Ben

That said here’s the updated version – it adds a 3rd page with a few extra tips and there is a bit thrown in about $true and $false on page 1.

PowerShell Cheat Sheet V2.00

I created a new 3 page cheat sheet for SharePoint to supplement the above sheet:

SharePoint PowerShell Cheat Sheet

If you want both in the same file they can be found here:

Combined PowerShell and SharePoint Cheat Sheet

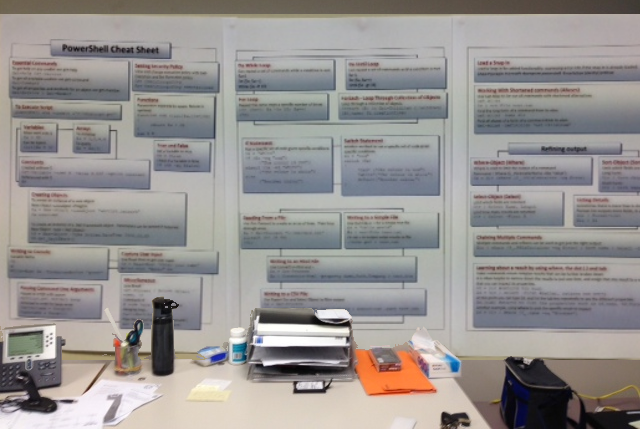
I’ve introduced co-workers to PowerShell and the Cheat Sheet is always very popular:

CheatSheetwall


Powershell for working with SharePoint Recycle Bin

I had to look through the SharePoint recycle bin today to look for something – the UI interface is a bit lacking – it only shows 200 items at a time with no ability to search so I turned to powershell…

Looking at the recycle bin is actually very easy…

# recycle bin's are tied to a site collection so we need a site collection object

$site = get-spsite http://www.yoururl.com

#we can see everything in the recycle bin like this:
$site.Recyclebin

#unfortunately, the above command dumps quite a lot to the screen.
#fortunately, we can pipe the output to other commands for filtering and cleanup.

#This command will return all the webs in the recyclebin
$site.Recyclebin | where {$_.itemtype -eq "web"}

#we can build on this by adding a sort statement, 
#here I sort by dirname, which is the URL path the item would have been at before it was deleted
$site.Recyclebin | where {$_.itemtype -eq "web"} | sort dirname

# we can format the output into a nice list
$site.Recyclebin | where {$_.itemtype -eq "web"} | sort dirname | select title, itemtype, dirname, itemstate

#note that in the above listing, itemstate shows which recycle bin it's in (FirstStageRecyclebin = End user Recycle Bin Items, SecondStageRecycleBin = Deleted from end user Recycle Bin)

#here's one more application of filtering to show everything that's not a page nor a list item

$site.RecycleBin | where { $_.itemtype -ne "file" -and $_.itemtype -ne "ListItem" } | sort dirname | select title, itemtype, dirname

Using some of the simple queries above, I was able to look deep inside our recycle bin quickly without having to browse it in pages of 200 items at a time.

Update: this came in kinda handy.. one of our developers wrote some “site clean up code” Long story short, several hundred web’s were deleted that should not have been…

#script to restore all the webs in the recycle bin
#note: be sure to scroll over
#the word press template cuts off the right side
# or choose "Full screen" from the menu on this code window
$SiteCollection = get-spsite http://www.yoururl.com
$SitesToRecover = $siteCollection.RecycleBin | Where {$_.ItemType -eq "Web" -and 
#in this where clause, it's best to run this twice - the first time, restrict it to the root sites, with the $_.Dirname -eq "sites/myteamsites", then after those have been restored, you can take that last statement out and run it again to get the sub sub webs.
$_.DeletedBy -like "SHAREPOINT\system" -and $_.Web -Like "" -and $_.DirName -eq "yourrootURLfragment"}
foreach ($OneSite in $SitesToRecover) { $OneSite.Restore() }


One More:

#Deleting an item didn't work with the $item.delete() 
#"Due to the state of the object" 

#I found this worked instead
$sitecol = $get-spsite http://yoururl.com
$items = $sitecol.recyclebin
$item = $items | Select -first 1
$Guid = new-object system.guid($item.id)
$sitecol.recyclebin.delete($guid)


Simple PS script to move users between SharePoint Security Groups

Today a user had a simple request – about 450 users were added to the wrong SharePoint Group.
They needed to be moved from the Members group to the Visitors group.

My first thought was to rename the groups and change permissions, but the user had already started the process and had moved about 100 of them manually before calling me.

So I had to move 350 users, and couldn’t rename and re-permission either Group.

My first though was to just dump a list of all the user ID’s from the Members Group using Powershell – I would paste them into the GUI to add them to the Visitors Group.

I used powershell to get the list of users:

$web = get-spweb "http://urlto.yourdomain.com/yourweb"
$group = $web.groups | where {$_.name -eq "Name of your Group" }
foreach ($user in $group.users) { $user.userLogin + ";" }

The above script dumped a bunch of user ID’s to the screen and my intention was to copy that right off the PowerShell screen. (Note I added the semicolon to make it easier to add the whole list in one copy/paste operation)

My first snag was that you can only paste in 200 users at a time, not a big deal, I did a few small groups.

Now I just needed to delete all the users from the Members group- Easy Right?
Well, it would be if I had less than 30- SharePoint only shows 30 members of a group at a time. You can select all 30 pretty easily, but I wanted to delete 350.

Back to Powershell
This script deletes everyone in the given group:

$web = get-spweb "http://urlto.yourdomain.com/yourweb"
$group = $web.groups | where {$_.name -eq "Name of your Group" }
foreach ($user in $group.users)
 { 
   $group.RemoveUser($user)
 }

Job Done.

Of course, at this point, I thought, shoot, I could have/should have just scripted the whole copy operation – can’t be that hard right?

$web = get-spweb "http://urlto.yourdomain.com/yourweb"
$SourceGroup = $web.groups | where {$_.name -eq "Name of your Source Group" }
$TargetGroup = $web.groups | where {$_.name -eq "Name of your Target Group" }
foreach ($user in $Sourcegroup.users)
 { 
   Write-Host "Moving $user from $SourceGroup to $TargetGroup"
   $TargetGroup.AddUser($user)
   #$SourceGroup.RemoveUser($user)
 }

Disclaimer – I haven’t tried this- by the time I got this far, I had already deleted all the users so this is more of a “for future reference” kind of script.

Ideally there might be a return value on .addUser that would let me know if it was successful, or you might run the script twice, the first time with the remove statement commented out, Then do a quick visual check that your Target Group has the users you need, then run it again to empty the SourceGroup.

Using MaintenanceWindows in SharePoint 2013

Sharepoint 2013 Maintenance Window Banner ScreenShot
Sharepoint 2013 Maintenance Window Banner


At the SharePoint Conference this week, Session SP210 on upgrading to SP2013 mentioned a brand new feature that didn’t exit in the preview edition: MaintenanceWindows.

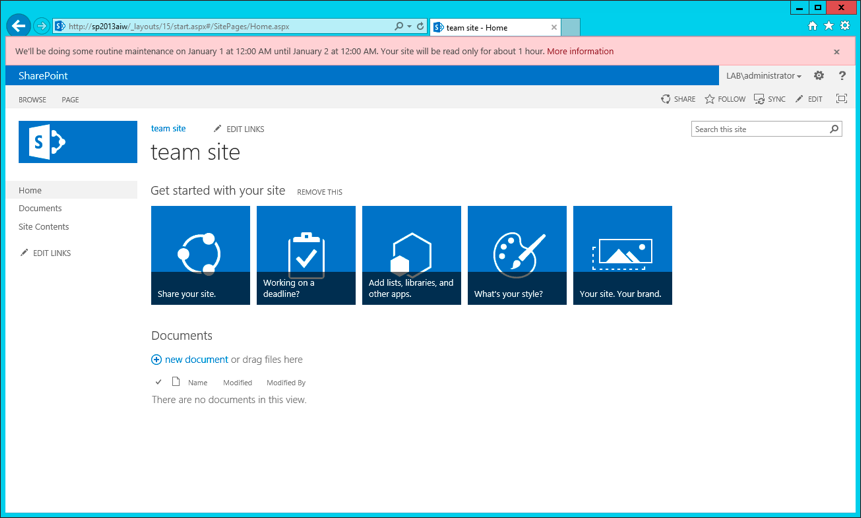
As you can see from the screenshot above, this feature puts up a simple banner alerting users of the upcoming work.

The message is localized in the users language so long as language packs are installed.

The “More Information” link can point to any page you specify.

I was pretty excited about this, and couldn’t wait to try it out!

The PowerShell to do this wasn’t as easy as I expected.

I’ve pasted below what worked for me.
 

 #1st get a content database
 get-SPContentDatabase  #this will list them all
                        #copy and paste a database ID and use it to assign a specific DB to a variable
 $ContentDB = Get-SPContentDatbase -Identity #ID goes here

 #now we're going to add a maintenance window to the SPContentDatabase with $ContentDB.MaintenanceWindows.Add()
 #before we can do that we need to create a Maintenance window object and populate it.

 #                         Parameter List             "MaintanceWarning or MaintanencePlanned",  Mt Start   ,  Mt End   , Notify Start, Notify End, duration , urlforinfo
 $MaintWindow = New-Object Microsoft.SharePoint.Administration.SPMaintenanceWindow "MaintenancePlanned", "1/1/2013", "1/2/2013", "11/16/2012" , "1/3/2013", "1:00:00", "http://www.mydomain.com/outageinfo.html"
    #Parameter List for above:
      #1: MaintanceWarning or MaintanencePlanned,
      #2: Maintenance Start Date
      #3: Maintenance End Date
      #4: Notification Start Date
      #5: Notification End Date
      #6: Duration in the format of DD:HH:mm:ss - "1:00:00" = 1 hour, "1:00:00:00" = 1 day
      #7: URL for info
      # Parameters 2-5 all take a date time in this format: "1/20/2012" or "1/20/2012 5:00:00 PM"  

  #Now we can see the properties of a single MaintenanceWindow by just typing in $MW and hitting enter:
  $MaintWindow

  #for me this looked like this:
  # MaintenanceStartDate        : 1/1/2013 6:00:00 AM
  # MaintenanceEndDate          : 1/2/2013 6:00:00 AM
  # Duration                    : 01:00:00
  # NotificationStartDate       : 11/16/2012 6:00:00 AM
  # NotificationEndDate         : 1/3/2013 6:00:00 AM
  # MaintenanceType             : MaintenancePlanned
  # MaintenanceLink             : http://www.mydomain.com/outageinfo.html
  # UpgradedPersistedProperties :

  #ok with that out of the way, we just need to add it to he content database
  $ContentDB.MaintenanceWindows.add($MaintWindow)
  $ContentDB.Update()

Ok so that’s it – refresh your website and you should see the pink banner on the screenshot above!

Note, I originally tried to do this by just setting up a blank object without paramters, and then setting the properties one by one, but I found that MaintenanceStartDate and NotificationStartDate could not be changed after the object was created.

– Jack